Surface Skinning
Download Hip File
I came across this innocuous looking problem in production recently - winding or unwinding a single surface which has been sliced by a curve:
Although KineFX has been around for a while now (almost 3 years!) my interactions with it have been very brief and I am by no means an expert. This rig seemed pretty straightforward though - slice the surface, draw a reasonable curve skeleton through the centre of the ‘ribbon’, add a proximity capture, and you’re done - right?
Not quite..! Proximity-based capturing is destined to fail here - even with our skeleton is perfectly centered on the ribbon and Max Influences set to 1. Many points along the slice share the same position, so how does a standard proximity capture know which ‘ring’ of the spiral skeleton is the right one to capture against?

The slicer is shown in grey. Note the capture regions ‘leaking’ over into adjacent rings of the ribbon we have cut.
Here is the result of the capture above with some VEX-based rolling in a Rig Wrangle. It works great near the skeleton but falls apart at the edges:

Attribute Fill
Perhaps to get around this we could capture in a small region around the skeleton and expand this data outwards to the edge of the surface, resulting in a connectivity-sensitive capture? Flood fill can do just this. It’s fundamental to many operations in 3D, but it wasn’t until Houdini 19.0 that SideFX gave us the Attribute Fill SOP to do this in a convenient way without Solvers.
Drop down a Joint Capture Proximity SOP and reduce the radius of the dropoff so no capturing happens near the sliced edges. Follow it up with an Attribute Fill SOP in Interpolate mode, set to boneCapture. Houdini will crash!
Unfortunately boneCapture is a complicated attribute. It’s an array of point numbers (on the skeleton) alongside an array of influence weights for these points. These are then compressed into a single ‘boneCapture’ attribute (also an array), with the original data only accessible via the Capture Attribute Unpack SOP.
The algorithms available in Attribute Fill only make sense for float attributes, so we can’t use it with boneCapture or even the unpacked boneCapture_index and boneCapture_data it wraps. We’ll have to get creative.
We add a curve-UV attribute u to the skeleton and transfer this to the surface in a very small region near the curve. With Attribute Fill we can spread this across the surface, giving discontinuities at the slice as we would expect. We now have an accurate corrsespondance between the surface and skeleton to modify our capture with.
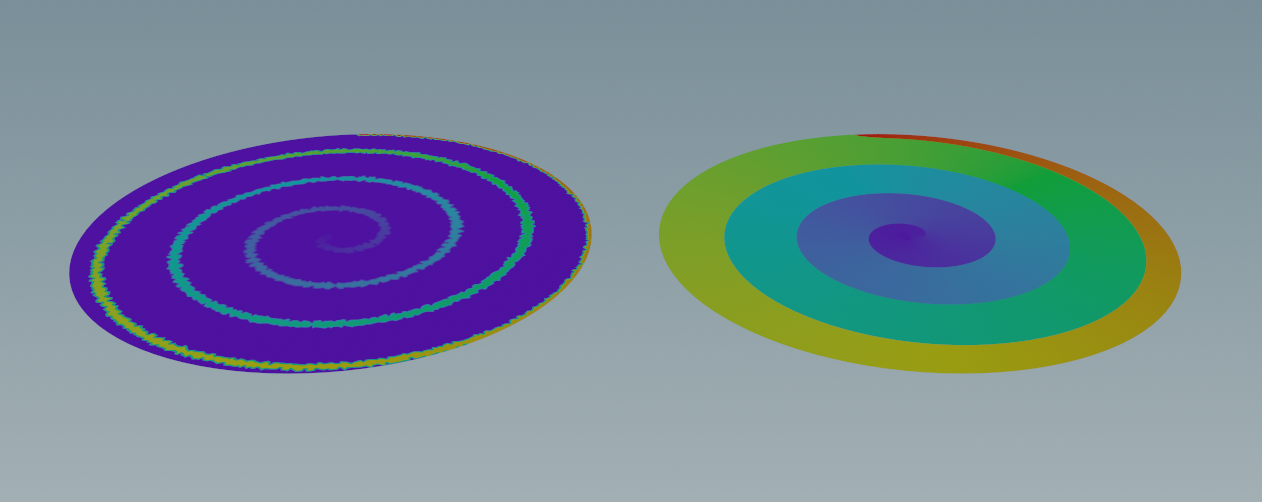
Left: curve u attrib transfer from skeleton to surface (small radius). Right: result after Attribute Fill
Capture Attribute Manipulation
Take the original Joint Capture Proximity test and unpack the capture attributes boneCapture_index and boneCapture_data. We have 1 influence point so each array has a single entry and the capture weight is always 1.0.
We can use the u attribute on our surface to replace boneCapture_index. Convert both the skeleton and surface to ‘UV space’ and find the point number on the skeleton which corresponds to the u attribute value for every position on the surface using nearpoint(). Leave boneCapture_data at 1.0 and repack the capture. Joint deform now behaves as we want it to!
Smoothing Captures
With only a single capture influencer the deformation is very crude and causes jagged results. There are several options for expanding the capture regions and smoothing results:
The Smooth SOP. Luckily this node works with boneCapture, expanding the index and weight arrays nicely.
The Capture Layer Paint SOP. Usually used to interactively edit capture regions by painting in the viewport - but you can also apply global smoothing with the Apply to All Operation.
Editing the boneCapture_index and boneCapture_data directly using VEX, if you are a complete masochist.
Capture Region visualisation with a single influencer, and progressive smoothing to multiple influencers
Finally, add a Deltamush for extra polish to achieve the result shown at the top.
If you enjoy this content, consider subscribing to my Patreon!